Full SetUp Docs
Overview
This section takes you through the steps to create your own Task Manager Server which can then be used to create and work with Tasks.
You only need to follow this if you want a private Task Server. If you’re using the public Task Server provided by Yella Umbrella, you can skip it.
You will need an AWS account. This brief guide assumes some AWS knowledge.
Outline requirements
- A private S3 bucket with CORS configured.
- An Intel (x86_64) EC2 running Amazon Linux 2023 (e.g.,
c7i.large). - A PostgreSQL database server (local on EC2, RDS, or other) — two separate databases will be used.
Creating an S3 Bucket
Go to the S3 Management Console in AWS.
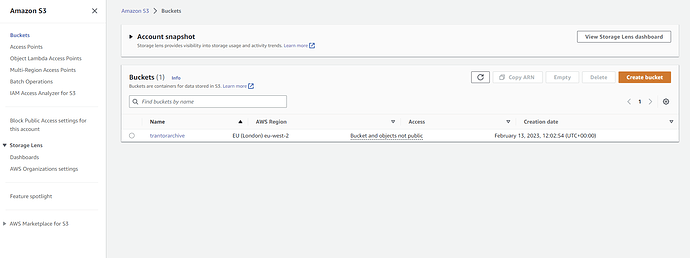
Click Create bucket.

We’ll create a basic S3 bucket (see S3 FAQ for details).
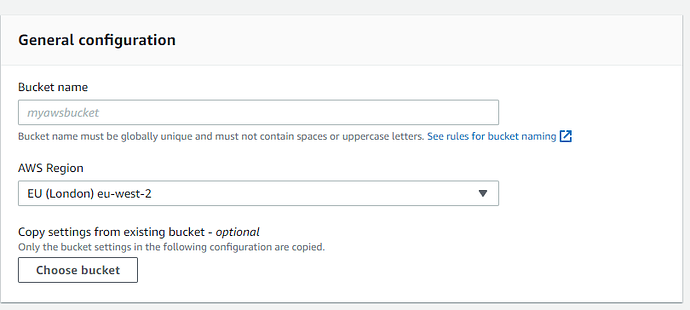
General configuration:
- Bucket name — choose a unique name.
- AWS Region — choose the same region as your EC2.
CORS configuration
At Permissions → Cross-origin resource sharing (CORS), set:
[


{


"AllowedHeaders": ["*"],


"AllowedMethods": ["HEAD", "GET", "PUT", "DELETE"],


"AllowedOrigins": ["*"],


"ExposeHeaders": ["ETag"],


"MaxAgeSeconds": 3000


}


]
This allows Stellar to access pre-signed URLs issued by the Task Server.
The rest of the options can remain as default for this tutorial.
Creating an EC2 instance
Open the EC2 Management Console.
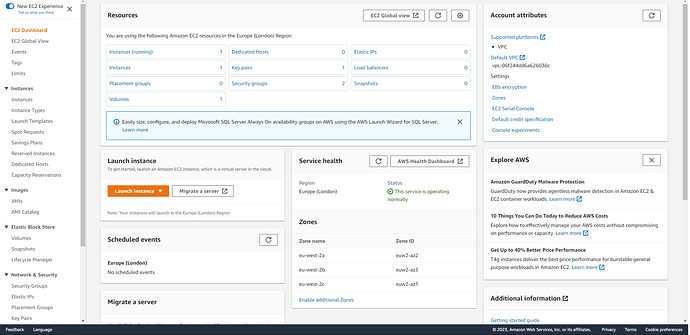
Click Instances.

You’ll see the Instances list.
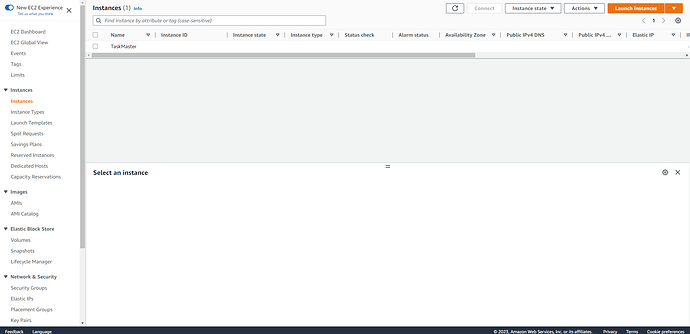
Click Launch instances.
The following has many settings (see EC2 FAQ). We’ll cover the essentials.
Name and tags
Assign a descriptive name.

Application and OS Images (AMI)
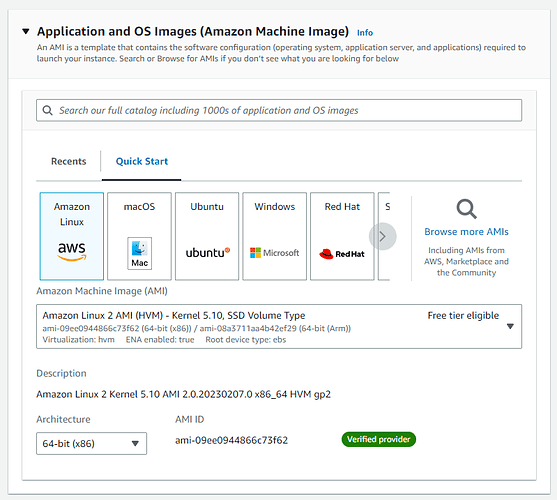
Select Amazon Linux (Amazon Linux 2023).
Use 64-bit (x86) architecture (Intel).
Amazon Linux 2 is deprecated in favor of Amazon Linux 2023.
Instance type
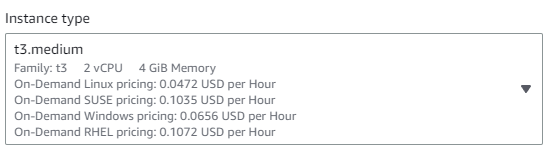
Choose a type; for example: c7i.large (2 vCPU, 4 GB).
Key pair (login)
Choose an existing key pair or Create new key pair.
You cannot change this later.
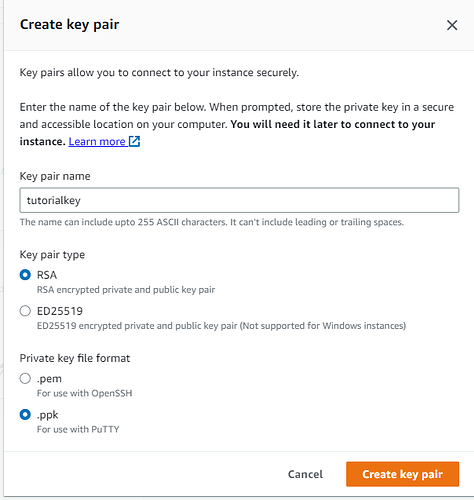
- Key pair name — choose a name.
- Key pair type — RSA.
- Private key file format — choose
.ppkif using PuTTY.

Select your key from the dropdown (use Refresh if it doesn’t appear).
Network settings
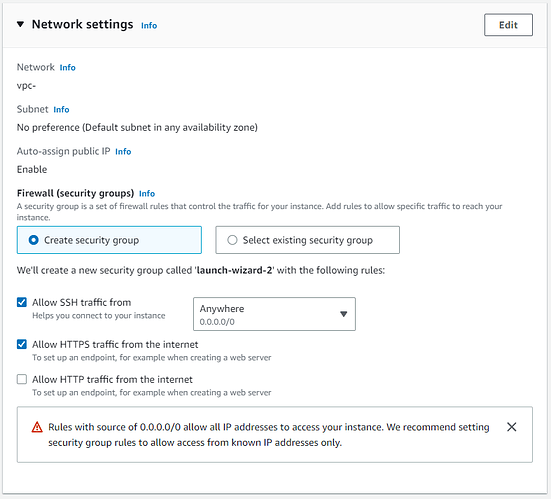
Choose or create a security group. Enable HTTPS from the internet.
Lock down SSH (port 22) to specific IPs later.
In corporate environments, you may put an ALB/ELB in front. In that case, the EC2 may be private (no public IP), and traffic flows through the LB. SSH/SSM access patterns change; consider AWS SSM. File transfers can be handled via S3.
Storage
Configure EBS volume(s).

- For small/medium Task Servers, 20 GB is usually enough.
- Choose gp3 (faster/cheaper than gp2).
- If you will run conversions/actions on EC2, size for ~5x your largest media.
- E.g., films of 50 GB each → 20 + 250 GB.
You can expand EBS later if needed.
IAM instance profile (S3 access)
We’ll allow the EC2 to access the S3 bucket.
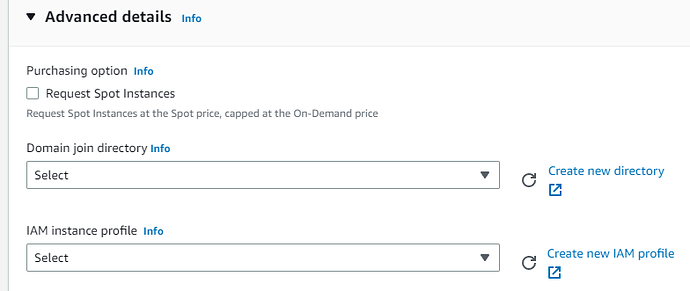
Go to Advanced details → IAM instance profile → Create new IAM profile → Create role.
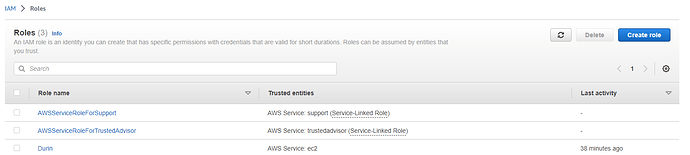
![Trusted Entity] (/img/task-server/trusted-entity.png)
- Trusted entity type: AWS Service
- Use case: EC2
Click Next.
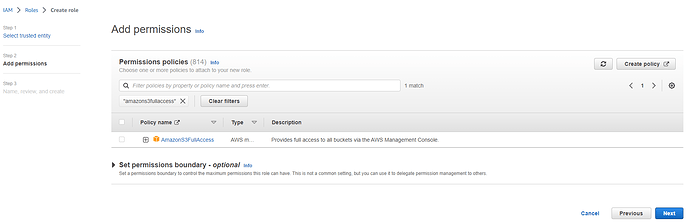
Add permissions → search for AmazonS3FullAccess and select it.
Role details → name & description → Create role.
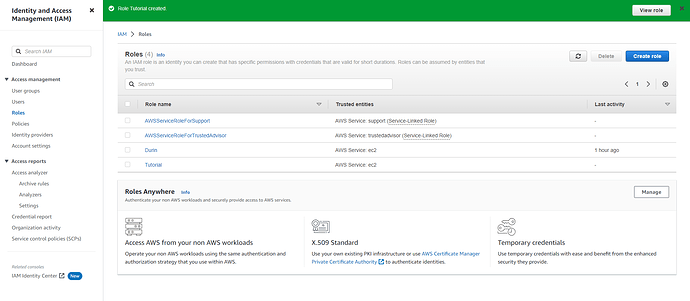
Back on the Launch screen, select the role in IAM instance profile (refresh if needed).

For production, scope the role down to your single bucket. The minimum S3 policy (replace your-bucket-name):
{


"Version": "2012-10-17",


"Statement": [


{


"Effect": "Allow",


"Action": ["s3:ListBucket","s3:GetBucketLocation"],


"Resource": "arn:aws:s3:::your-bucket-name"


},


{


"Effect": "Allow",


"Action": [


"s3:GetObject","s3:PutObject","s3:DeleteObject",


"s3:ListMultipartUploadParts","s3:AbortMultipartUpload"


],


"Resource": "arn:aws:s3:::your-bucket-name/*"


}


]


}
Termination protection
Enable Termination protection to avoid accidental data loss.

Review settings → Launch instance. You should see a success message.
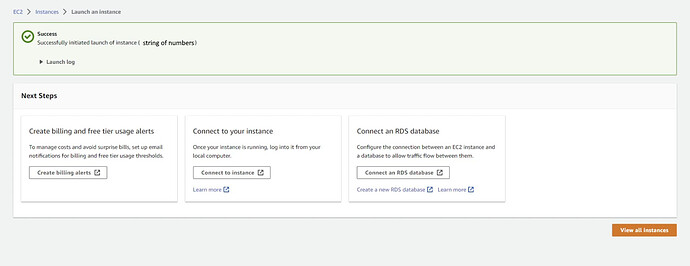
Your instance will now appear in the console.
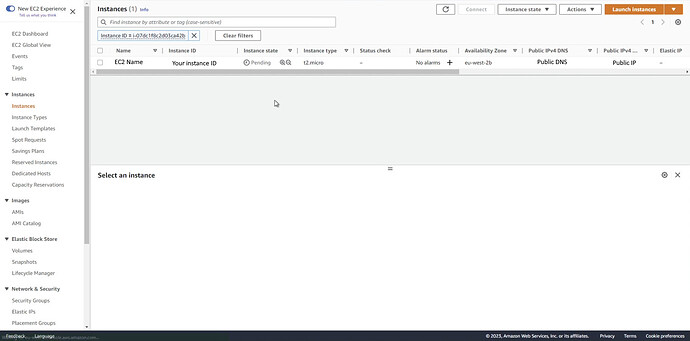
Domain name
If you’re happy with a domain ending in .taskserver.net, the device can automatically create DNS entries and HTTPS certificates. This only applies if port 443 is publicly exposed (no ALB/ELB handling TLS).
Example: yourcompany.taskserver.net — configure your Task Server for this domain and it will automatically serve HTTPS.
If you want a different root domain:
Option 1: Terminate HTTPS at an ELB/ALB
- Use an Elastic Load Balancer / Application Load Balancer.
- Provide your own domain & certificate on the LB.
- Configure Websocket Distribution Process for port 80 with SSL disabled; forward HTTP from LB to EC2:80.
Option 2: Use a local certificate
- Place certificate files on EC2 and reference them in the configuration.
- Configure Websocket Distribution Process for HTTPS with certificate paths.
Task Server Device
Go to [https://nebula.yella.tv/] and log in.
Left sidebar → Devices → Templates tab (list of templates).
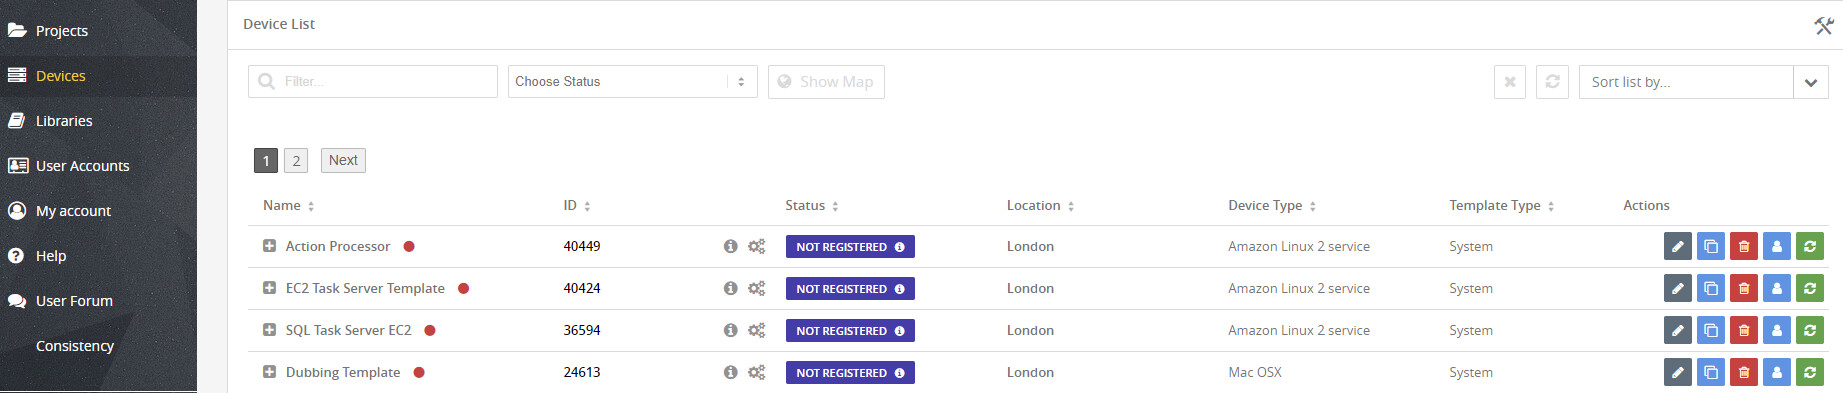
Choose EC2 Task Server Template, click the Clone icon.

Fill the clone form:
- Device Name — a name for the device
- Clone Suffix — optional differentiator
- Description — optional
- Location — same region as EC2/S3
- Device Type — Amazon Linux 2 service (default)
- Create Template — No
- Clone Type — Device and all project and processes
Click Clone device. It appears in Devices with a status row.

Click the cog wheels icon to expand the device.
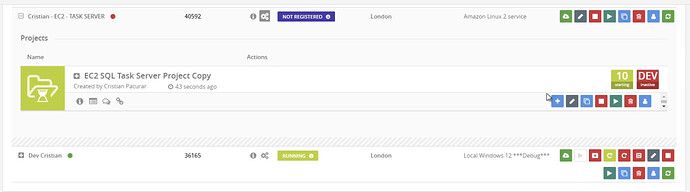
Click the Processes expand icon to view processes.
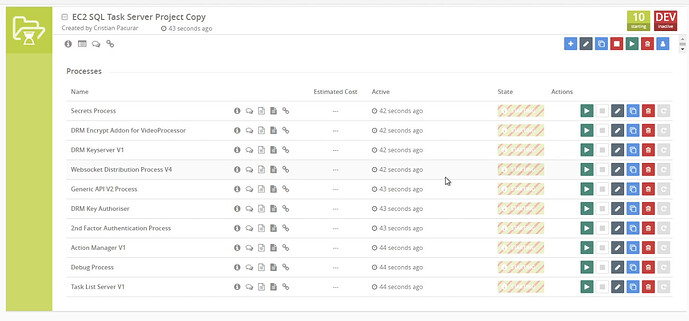
Task Server Configuration
You’ll configure several processes.
Prerequisites:
- Your domain name — this tutorial uses a
.taskserver.netexample. - Your S3 bucket URL — like
s3://your-bucket-name(usehttps://when entering server URLs in processes).
Generic API V2 Process
- Websocket Server — add the secure websocket link.

- Websocket Authentication — copy the string (used later).

Websocket Distribution Process V4
Click the pencil icon to edit.

- Server domain — set your server’s domain.

- API — paste the Websocket Authentication string into API Key String.

2nd Factor Process
- 2nd Factor URL — your domain with
https://.
Action Manager
- Server URL — your domain URL.

Task List Server V1
- Server Name — a friendly name
- Server URL — your domain

Storage configuration — Amazon S3
- Storage Type — Amazon S3
- S3 Root Path — your S3 URL
- Access Key ID / Secret Access Key — your S3 credentials
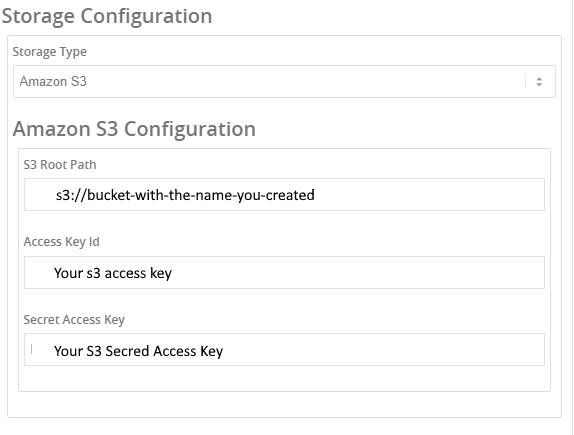
PostgreSQL — Task Manager and Action Manager
Both processes require PostgreSQL (can share the same server).

Add JSON files to configure DB access (safer than storing secrets in the UI). Suggested paths:
/home/ec2-user/nebula/actionmanager/dbConf.json
/home/ec2-user/nebula/taskserver/dbConf.json
Example (local Postgres) — Task Server:
{


"type": "postgres",


"connection": {


"host": "localhost",


"port": 5432,


"user": "postgres",


"database": "task_server",


"password": "PasswordForPostgres"


}


}
Example (local Postgres) — Action Manager:
{


"type": "postgres",


"connection": {


"host": "localhost",


"port": 5432,


"user": "postgres",


"database": "action_manager",


"password": "PasswordForPostgres"


}


}
- For RDS, change
hostto your RDS endpoint and ensure the EC2 can reach it. postgresis typically an admin user. Task Server & Action Manager can create their DBs on first run. In production, consider scoped users:- bootstrap with
postgres, - then switch to restricted users.
- bootstrap with
- For remote DBs, prefer SSL:
"ssl": { "ca": "/path/to/ca.pem", "rejectUnauthorized": true }
For non-SSL: omit ssl or set rejectUnauthorized to false. For self-signed, supply the CA and set true.
Creating the Device Package
When processes are configured, click the download icon for your device.

Confirm the prompts and Download.


You’ll get a ZIP with required files.

Connecting to EC2
Use PuTTY (or KiTTY) to connect (or use AWS SSM if in private subnets).
You’ll need:
- Public IPv4 DNS (from EC2 console)
- Your key (
.ppk) from instance creation
PuTTY
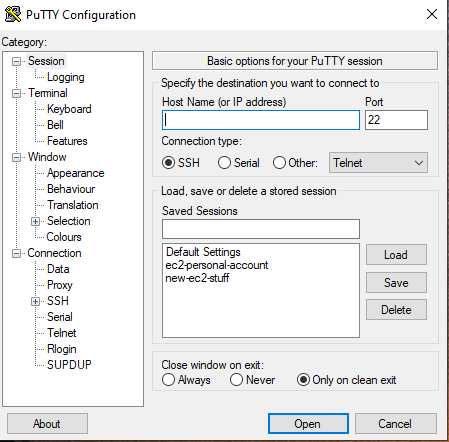
- Session → Host Name — paste Public IPv4 DNS.

-
SSH → Auth → Credentials → Private key file — browse to your
.ppk. -
Session → Saved Sessions → name it → Save → Open.
Login as: ec2-user
If successful, you’ll see the Amazon Linux banner and a shell prompt.
Copying Task Server Files
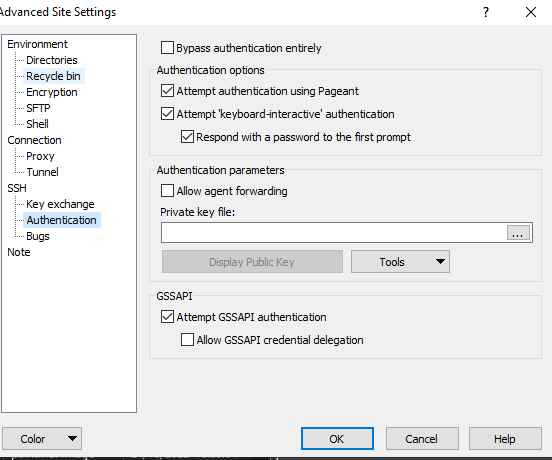
Use WinSCP (or any SFTP client) to upload the ZIP contents.

- Host name — Public IPv4 DNS
- User name —
ec2-user - Advanced → Authentication → select your
.ppk→ OK - Save the session, then Login


Unzip the device package locally; you should have 4 files similar to:

Upload them to /home/ec2-user/ on the EC2 (right-hand pane).


The correct home path is /home/ec2-user/ (not /user/ec2-user/).
Installing the Task Server
Back in PuTTY:
List files:
ls


# e.g.


# install-40702.sh  Neb_cristian_stelaris_40702  readme40702.txt  service.pattern
Open the readme*.txt from the unzipped package (on your desktop). It contains all commands for your device.
Run the install command (example):
chmod 755 install-40702.sh


./install-40702.sh
If successful, you’ll see hints like:
To run it now use:


- sudo systemctl start YourDeviceName.service
- or reboot
Start the service:
sudo systemctl start yourdevicename.service
In the Nebula Dashboard, you should see all processes green/running.
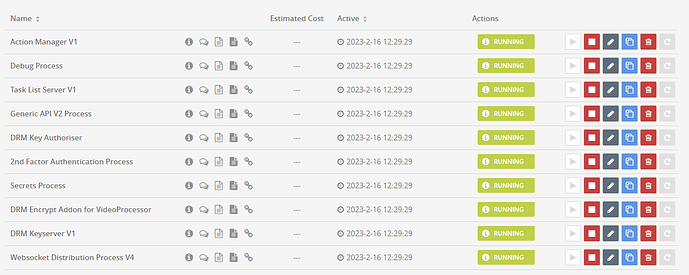
Common service commands
# start


sudo systemctl start yourdevicename.service


# stop


sudo systemctl stop yourdevicename.service


# restart


sudo systemctl restart yourdevicename.service


# disable at boot


sudo systemctl disable yourdevicename.service


# enable at boot


sudo systemctl enable yourdevicename.service


# view logs


journalctl -u yourdevicename.service


# view last logs


journalctl -e -u yourdevicename.service


# follow latest logs


journalctl -f -u yourdevicename.service
Using Tasks
Main thread with full usage docs:
[https://forum.nebula.yella.tv/t/task-manager/327#tasks-1]
Allowlist (network egress)
System
https://nebula.yella.tv
Public Task Server
https://public.taskserver.net/
Speech Synthesis
https://texttospeech.googleapis.comhttps://vaas.acapela-group.comhttps://www.acapela-cloud.comhttps://cerevoice.compolly.eu-west-1.amazonaws.com(potentially*.amazonaws.com)https://api.elevenlabs.io
ASR
https://api.rev.aihttps://speech.googleapis.com/https://asr.api.speechmatics.comhttps://transcribe.eu-west-1.amazonaws.com
MT
https://translate.googleapis.comhttps://api.xl8.ai
M&E Generation
https://groovy.audioshake.ai/
Let’s Encrypt access (device not starting)
Ensure direct access to lencr.org on port 80 via your corporate firewall:
lencr.org— certificate infrastructure and revocation checks
If lencr.org is blocked, certificates cannot be validated and the device may fail to start.